You could do this with other thin paper but origami paper is colored on one side and white on the other.
Equipment:
- Origami Paper
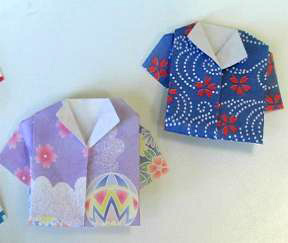
Origami Hawaiian Shirts
Print RecipeInstructions
Fold the paper exactly in half with the colored side out. Open it up and lay it flat with the white side up and the fold line going straight up and down.
Next, take one side of the paper and fold it in toward the middle, with the edge touching the first fold line. Do the same on the other side. Now you have a long piece with the color outside and a slit down the middle. Flip it over so the slit side is facing down.
Next, fold the narrow end to the narrow end. Now you have a colored square with a slit on both sides.
Decide which of the two sides looks the nicest. Turn that side down toward the table.
Now, take the top edge of the paper closest to the slit and turn it out until you have a triangle that goes all the way down to the bottom of your square. Do the same on the other side. You should have a piece that looks like the white lapels on a tuxedo. When you turn that over, you will see that you have short sleeves on the "good" side of your origami. Turn a little bit of the top edge down to make shoulders.
Last, put your fingertips into the slit on the good side and turn out two little triangles. This is the collar of your Hawaiian shirt!
No Comments